The steps to assemble Computers Consecutively and Right
The steps to assemble Computers Consecutively and in this chapter we can already begin to assemble a computer. To be able to assemble a computer not needed special skills, as each person can do this.
When assembling a computer there are several things to be aware of, the formula is: 4J
1. Don't rush2. Do not be Nervous
3. Don't panic
4. Don't get me wrong Plug
To secure our physical so as not to exposed the flow of electricity, then note the following:
1. use Footwear2. do not wet/sweaty Hands
3. we can rub the hands into the cassing Agency to eliminate static electricity
3.2.1 preparation before Assembling
There are a few things to note before assembling, among others:1. Auxiliary Equipment
The included tools are screwdriver plus and minus screwdriver with small and medium size, long and short, tweezers and sometimes we need.
2. Cleaning equipment
Cleaning equipment or in other words could be called care, such as a brush, vacuum cleaner/vacum cleaner, and cleaning/Sanpolly.
3. Safety Equipment
Safety equipment here is none other than to protect us from the static electricity, we can use Static Wristband/Neutralizing static electricity Flow.
3.2.2 Installing the processor and the processor cooling fan
Installing The Processor
To note in install processor is determining the Chief processor and the processor socket head. Chief processors are typically characterized by:
• One of the angle is obtuse and different from the other angle
• In one corner there is a black/white dots
• On the wrong corner near kaki-kakinya there is a small line/box small
How to install:
• Open the socket lever hook
• Attach the processor in the socket, and do not be too pressed
• Close the back hook lever socket.
• Plug the blower/fan pendingan processor and don't forget to install powernya
Install The Processor Cooling Fan
How to install
• Attach the cooling fan right above the processor
• Make sure the refrigerant already fitting its location
• Press the left and right sides to lock the position of the fan
• Move the Lever of the fan to the back and fore to lock permanently.
• Install the fan Power cable to the motherboard-
3.2.3 mounting the Memory/RAM
To note in install memory is a type of memory that we use and installation of memory slot, whether SDRAM, DDR RAM or more. What separates the two is the position of the leg/foot gaps of memory.
Installation steps of RAM:
1. press the lever locking slots on the right and left of the slot
2. Pay attention to gaps that exist in the slot
3. install the RAM corresponds to the position of the slit, and press until it snaps
3.2.4 installation of Mainboard
Next is the installation of Mainboard into the cassing, the steps are: Open the cover of the casing to the right using a screwdriver plus
Pull back the cover of the casing so that the casing is open
Attach couplers to put bolts in the chassis
Enter slowly Mainboard into the casing and customize with your existing Couplers
Then tighten the bolt with the Mainboard
3.2.5 Installation Disk and IDE Cable
To install the Hardddisk, use the drive bay that you have prepared on the cassing, step-step:
1. install the hard drive in the drive bay, then fasten with bolts
2. Plug the cable in a position that's been determined (see picture)
3. the end of a long Cable fitted to the Mainboard
4. the other end of the cable is plugged into the hard drive
3.2.6 Installation CDROM drives and IDE Cable
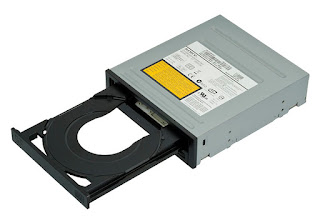
What to look for in install CD ROM jumper is positioned on a CD ROM (SLAVE) to collision with the positions of hard disk (MASTER), because we use 1 IDE cable. For installation steps can be seen on the image beside.
3.2.7 Installation Floppy Drive and cable
To note in install Floppy Disk Drive is a position the cord do not get reversed, if reversed wiring will cause no terbacanya diskette.3.2.8 the installation of Power cable
Installing the power cable should be cautious, if not careful can lead to computer/device not detected/life could even burn.1. Installation of Mainboard Power cable
-Search 20 Pin mainboard power cable from the Power Supply (see picture)
-Plug in the socket provided on the mainboard (see picture)
2. Installation the processor Power cable
-Search for processor power cable 4 Pin of the power supply (see picture)
-Plug in the socket provided on the mainboard (see picture)
3. Mounting the hard drive Power cable
-Search 4 Pin hard drive power cable from the power supply (see picture)
-Plug in the socket provided on the hard drive (see picture)
-Power cable red met with data cable color red
4. Power Cable Installation CD ROM DRIVE
-Search CD ROM power cable 4 Pin of the power supply (see picture)
-Plug in the socket provided on the CD ROM (see picture)
-Power cable red met with data cable color red
5. Mounting the Floppy Drive Power cable
-Search the Floppy power cable 4 Pin (small) from the power supply (see picture)
-Plug in the socket available on Floppies (see picture)
3.2.9 Cable Mounting Panel
The cable bezel comes from cable in the cassing which then is connected to the front panel of the Mainboard. This cable is made up of several types, each of which have different functions. To be able to install the cable bezel of this, first we have to read the manual that came with the book when we buy a mainboard.These cables are composed of:
1. HDD Led, for the light red hard drive
2. Power Led, power for the light green color
3. Power SW/Stand-by button, to activate the switch on the computer
4. Reset, to activate the reset button the back Wiring 3.2.10
Installation of the cables on the back of this means installing the cable:
1. Electric Power
2. Keyboard + Mouse
3. The Monitor
4. Sound, etc.


